Pontiac Solstice Forum banner

Door Panel Faded

467 views 19 replies 9 participants last post by  makleinfamily12  
#1 ·
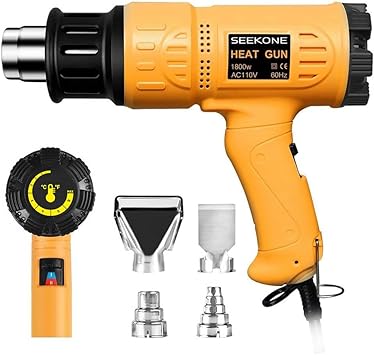
It has been covered, but I've never seen pictures of the repair. I tried several plastic restoration products that did not work, actually did not change anything at all. I finally decided to use the heat gun.

I practiced on an old lawn chair until I was confident I wouldn't ruin anything.

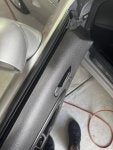
Medium heat, if you have an adjustable gun, about 1.5 inches away and keep the heat gun moving, never staying on one spot too long. It is shiny when you are done, but that fades after the plastic cools.

Driver's door to show progress before and 1/2 done
 

Attachments

#5 ·
Here is the heat gun I got off Amazon. For $30 it works great!
 
#6 ·
I did this method on my front inner fenders. He is correct. If you are very careful it can "recondition" the material and make it look black. I was taking out scratches that were made when they did the engine swap and found it very effective.

As to returning the color, the mechanism is it draws oils to the surface and they will off gas and fade again unless you put a protective coating on top. I bought the paint top coat that CW recommended for this purpose. If you coat it my understanding is it will greatly delay future fading. But CW will chime in.

How To Restore Faded Plastic Trim Using a Heat Gun

RTE
 
#7 ·
I did it on the coupe in a few places, mostly for scratches and a few for fade spots. it works good, not perfect but unless your are exzaminmg it for issues you want know. the rear sode pannels were badly scratched and some fading on one. most of it was gone when i was finished.and small parts you cant do the entire part and dont have to worry about blending. also did some of the dash where it looked like somebody was wearing spikes on thier boots...all gone. a few small places were barley visable but I did not want to do the entire dash. remember corners and bends are great places to blend and not be seen easily due to light reflection thats there any way. kinda like my home with about 4 different colors/shades in 1 room that all look like there the same color but are not.light,windows,angles and most of all shadows! it all changes things that we see and dont see...or dont know we see but do see and dont know it isant the same. your brain thinks thats a shadow or light or reflection...when infact its' different. same thing with doing car plastic parts, find the best blending point and use it.
 
#8 ·
Getting ready to do this on my door panels. That area is especially vulnerable to the sun with your top down so it's degradation wasn't surprising to me. As G-Ram affirmed, you're not going to change it with a "topical" application. Most "black restoration" products simply put an oil film on top making it look black again.

Ever notice how a piece of plastic turns white when you bend it in half? Most plastics are a white or cream color in their "natural" state. The colors are created with pigments added to them. When you stretch the plastic molecules by bending the plastic the surface area of plastic versus the little pieces of pigment are greatly magnified, making the plastic look white or lighter.

Photo-oxidation of the door panel occurs in the sunlight when it's hitting the top of the door panels. This breaks down the polymer (plastic) molecule chains leaving a higher ratio of "busted up" plastic chunklets versus pigment chunklets. (I'm copyrighting the term chunklet as I' just created it here and now!) When you melt the surface with the heat gun you're redistributing the broken up particles with the base resin molecules, effectively restoring the pigment distribution.

You will definitely have a higher gloss level after doing this as low gloss in plastic molding is created through surface texture. Lots of little jagged pockets on the surface keep the light from reflecting off of it giving a dull appearance. When you melt the surface you'll lose those little pockets. Fortunately, the door panel in it's original state does not have that dull of an appearance so your final result won't have as high of a difference from the surrounding area. (As Mark observed, there are differences but most casual onlookers won't pick up on it.)

I've seen "veterans" in the mold building industry "fix" surface texture in the mold steel using sandpaper and a plastic mallet. They lay the chosen grit of paper on the surface and smack it until it alters the surface enough to hide the damaged area of texture. More common is to put it in a blasting tank and hit it with various grits of aluminum oxide. Major calamities require the steel to be polished smooth and the original texture re-applied through acid etching.

Robs reference to the "Per-Fix" product I helped some of the members obtain way back when is spot-on (as usual.) But the difference in gloss can be more noticeable so I always recommend you do the entire panel and not just the afflicted area.

Very good results here! And yes, patience is your partner!
 
#10 ·
Put enough engineers in the same room and you can get good results. Or a lot of boring physics.

RTE
 
#12 ·
See anyone who answers first is never right enough LOL. Then we get an improved answer


RTE